Saturday, May 14, 2011
A gift for Baby Wyatt
Today I attended a baby shower for a wonderful expectant mom. All along I knew I wanted to make her gift but I didn't get started on it until last night. Yes, I am a pro in the procrastrination department.I ran to Michaels in between doctor appointments yesterday to pick up the toy box. I painted the base paint on and didn't have a clue what was going to be stenciled on it until about 10:00 this morning. The shower was at 1:00 so it was pretty much a rush job from that point on. I sprayed the last coat of sealer on it 10 minsutes before leaving for the shower. Whew...
Linking up to Funky Junk Interior
Stephanie Lynn's Sunday showcase
Friday, April 22, 2011
Just a little Easter gift for co-workers
Last night, I decided to put together a little Easter gift for my co-workers. I had some little decorative jars from Hobby Lobby, so I made some flavored molded chocolates and filled the jars. Then I printed this image from the graphics fairy in 2 different sizes, one larger than the other. I cut a circle out of the larger one using my nestibilities to fit the top of the jar. The smaller one I used as a tag. I tied a piece of seam binding around the jar and attached a Prima flower and the tag with a mini-safety pin. Thanks for stopping by and I hope everyone has a blessed Easter.
I'm linking to Funky Junk Interiors SNS
Sunday, April 17, 2011
Jute Silverware Holders
I have 50 yards of jute webbing. The majority of it has the black stitching in it and the rest has the red stitching. My original plan was to incorporate it into some pillows. And although I have seen several bloggers do that with great success, somehow I haven't got around to that yet. But recently, one day I was holding a strip of it in my hand, thinking there has to be something else I can use this for. I knew I was limited by the width of the webbing, but as I played with it, these cute little silverware holders were born. I didn't take any pictures while I was making these, so I will try to give you easy directions .
Cute a 13" length of jute webbing.
Fold the jute over towards the top front about 2/3 of the way up
If you are going to add lace (my first choice would have been a little box pleated strip of osnaburg) do that now. I stitched it on with my sewing machine.
Now measure how much room you have to add a patch with a graphic on it.
Print your graphic on a piece of fabric that will blend well with the jute.
Machine stitch to the front of the holder. After you have stitched it on, fray the edges all the way around..
I then machine stitched up the sides as close to the edge as I could as to not make the inside of the holder any smaller than I had to.
The last step: Fray the top of the back piece of webbing by pulling the jute that goes from side to side. Just keeping pulling it loose until your happy with the length that will be frayed. Reserve that string you just pulled out. To get it to have a soft frayed effect you will need to help it along a bit. First just rub your hand back and forth over it and then I took a whisk broom and briskly brushed back and forth.
Okay, now go find a large eye needle and thread it with that piece of jute you saved.
Cut another piece of webbing about 7 or 8 inches. Fold it in half, and then start stitching about 1" down from where the two ends meet. Then fray the 2 ends just like you did on the silverware holder. And.... you have a matching napkin ring. The possibilities are endless for embellishing these, but I left mine plain.
So what have you made with jute webbing. Please share your ideas!
Linking up to:
Funky Junk Interior SNS
Stephanie Lynn's Sunday Showcase
Making the World Cuter
Thursday, March 17, 2011
Primitive Lavender Sachets
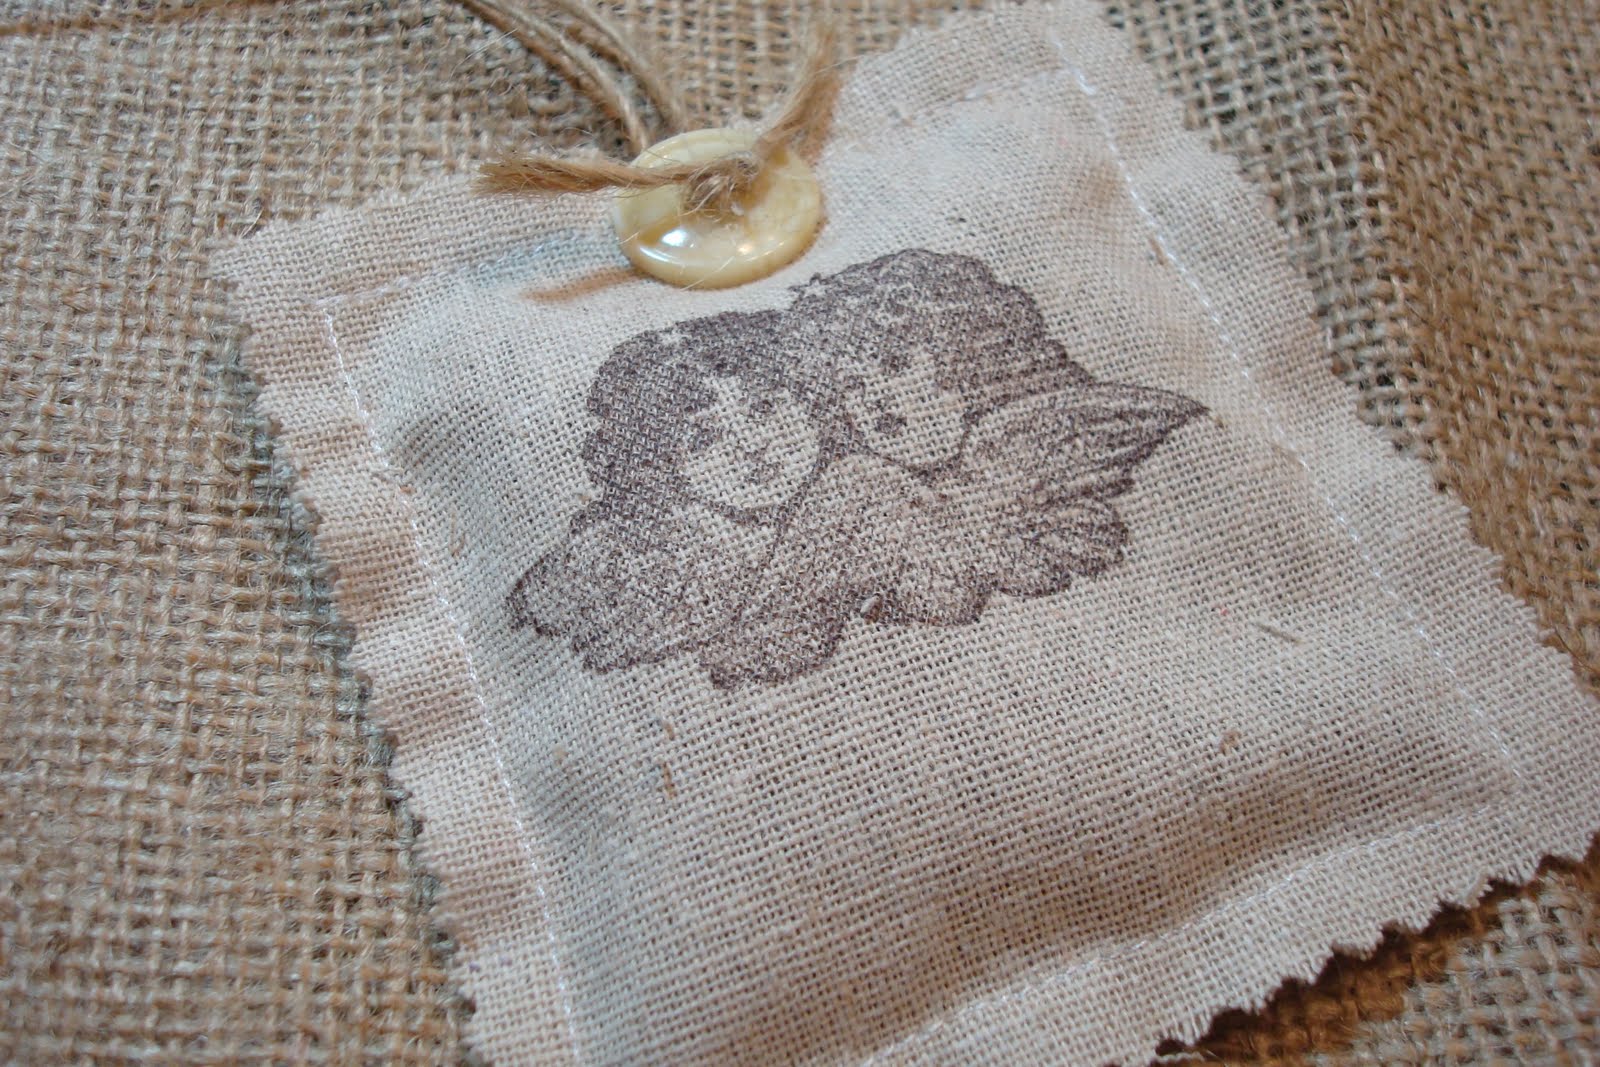
I am very proud to be a sponser for Shelly's Card Blog. Shelly is participating in a blog hop. Go to her blog and see how you can join in for the chance to win some prizes. The winner from Shelly's blog will get a set of 6 lavender sachets, hand stamped by me on osnaberg fabric filled with organic lavender buds. I have attached a jute hanger to each one so that they can be hung on hangers in your closet to keep your clothing smelling fresh and clean. You can hang them on a hook or door knob or just anywhere you wish. Hang one from the mirror in your car or tuck into a gym bag. Keep one inside your luggage and hang one in your linen closet. Lavender is a natural moth and insect repellant and also has the most relaxing effect not to mention the wonderful scent. If the lavender scent begins to fade, you need only squeeze the sachet, kneading the buds to make them release more of their natural oil. Now, I'm off to check out all the blogs participating in the blog hop. Good luck!
Saturday, February 5, 2011
Ryder Field
I made this baseball themed plague for my grandson Ryder. It hangs like a shadowbox and was made out of a 12 X 24 piece of plywood which had some molding added to all sides even with the top of the plywood. The molding is a little wider than the thickness of the plywood so it created a bit of a ledge for it to hang by. I first paint the wood then stenciled the design on it. After distressing I added some walnut stain to give it a more aged look. Sorry about the glare on the picture. I had given it to Ryder without taking a picture so his Dad took this picture with his cell phone. Thanks for stopping by and please come back again soon! I'm linking up to Donna's FJI
Monday, December 6, 2010
A Burlap Gift Sack
Thanks to a very special daughter, I have an abundance of large burlap sacks. I had a large gift to wrap, but knew wrapping paper would end up getting ripped. So, instead I utilized one of those sacks by painting a message on the front of it, tied a bow around it and called it done! I have been very absent from blogville over the last month and it doesn't look very good for showing up much between now and Christmas, so I want to take this opportunity right now to wish all of you wonderful bloggers and very happy, safe and blessed Christmas.
Linking up to Stephanie's Sunday Showcase
Centsational Girl
Thrilling Thursday
Friday, November 12, 2010
POTTERY BARN KNOCK OFF
Happy Friday to all. This has been the l-o-n-g-e-s-t week.
I know, I know!!! These pillows are old news. Seems like every time I finally arrive to catch the train it has already left the station..LOL. I used Osnaburg fabric, created a stencil with my Cricut Expression and painted the design on with fabric paint.
Thanks for stopping by and have a fantastic weekend!
Thursday, November 11, 2010
Stool makeover
A few months ago I was asked if I could recover a stool. I said yes, and then it went in my garage. Out of sight...out of mind...I was having major problems motivating myself to get after it. I think I just lacked the confidence to feel it would turn out okay. The owner had given me free reign with her only request being that I put Tracy's kitchen on it.This guy was a sight for sore eyes. It had obviously been in an auto parts store and showed all the wear and tear of such.
After a friendly inquiry from the owner about a week ago, I decided I'd better get myself in gear. What was the worst that could happen?? No matter what I did to it, it had to be an improvement over the torn vinyl and greasy foam. So I disassembled it, replaced the foam, painted a design on canvas and reassembled. The hardest part was trying to get the canvas stretched on correctly. I used an electric staple gun (which with me as the operator requires 2 hands) so the fabric is not as taunt as I would have liked. BUT....mission was accomplished, the owner was happy.
Tuesday, November 9, 2010
Best find in a while!!
My neighbors were cleaning out their garage this past weekend. As I was walking down the street I stopped to chat with them. I had earlier spotted this table and was very curious as to what they were going to do with it. They were getting rid of it and offered it to me for $5. There was no saying no to that. He even put it in his truck and carried it to my house for me. Now, I would guess that this couple is in their fifties, and he said that this had belonged to his mother.

Now, here's the surprise! This is not a table! The top folds back to reveal a desk!

And, then a board pulls out to offer a writing space!

And doesn't she have the prettiest legs?

I can't wait to start in on her makeover. Here is my dilemma, see the little shelves...like paper cubbies. I don't think I will be able to take that apart, so if anyone has any advise as to how I should tackle getting that area clean and repainted I would be extremely grateful!
Now, here's the surprise! This is not a table! The top folds back to reveal a desk!
And, then a board pulls out to offer a writing space!
And doesn't she have the prettiest legs?
I can't wait to start in on her makeover. Here is my dilemma, see the little shelves...like paper cubbies. I don't think I will be able to take that apart, so if anyone has any advise as to how I should tackle getting that area clean and repainted I would be extremely grateful!
Tuesday, October 26, 2010
A SIGN OF THE TIMES
A SIGN CAN GIVE US DIRECTION, LEAD US TO A PLACE OR EVENT, MAKE A BOLD STATEMENT, MAKE US NOSTALGIC OR MAKE US LAUGH. IT CAN INSPIRE US, REMIND US AND ENCOURAGE US.
I was so happy that "signs' won for this weeks theme on Funky Junk Interior's Saturday Night Special. Last week, after reading Donna's tutorial on making old signs, I made this .
I had so much fun, I couldn't stop there. So...I made this...
and this.....design credit goes to My Vinyl designer for this one
and this.....this one didn't get distressed cuz my sander went on the blitz. I also can't take credit for this design as the file was puchased and then a very kind graphic designer converted it for me so it would be compatible with my software.
Sanders working again and I was able to complete the last important couple of steps!
Thanks for stopping by!
I'm linking to Saturday Night Special
Saturday, October 23, 2010
My first try at heavy distressing
After making several signs and only doing a small amount of distressing, I decided to try something different. Donna, from Funky Junk Interior did a tutorial on how she makes old signs. You can see her's here. I had to give it a try. The base coat of paint looks blue, but it is gray paint I made by mixing black and white. Lesson 1: it doesn't take much black paint to make gray(the color in the picture actually looks blue). I didn't completely cover the surface. Then I came back with a haphazard coat of Barn Red, again not completely covering the surface. I stenciled the design on and then attacked it with my palm sander. It looks okay from a distance so I think for awhile it will reside on top of my kitchen cabinets.
I'm linking to Funk Junk Interior SNS
Thanks for stopping by!
Kathy
Sunday, October 17, 2010
High School Senior Subway Art

I was asked to make a subway art canvas for a highschool senior. This is the finished product. Hope you like it! Thanks for stopping by!
Linking up to Funky Junk Interior's SNS
Picture Frame

Hope everyone has enjoyed their weekend! This is a picture frame I did for Funky Junk Interiors Saturday Night Special. This is just a very inexpensive picture frame from a dollar store. I simply removed the back and mat, cut the vinyl design in mirror image to apply to the back of the frame. I glued the glass into the frame. I added a few crystals to the front for a little bling. The picture is.....
well far from good, but since I haven't posted anything in a few weeks wanted to get this on.
Linking up to Funky Junk Interior's SNS
Monday, September 13, 2010
Wooden Wine Crate Repurposed
I finally got around to going to a liquor store and asking if they had any wooden wine crates. PAY DIRT!!! I came home with 6 of them. This was the only one that would work for the project I had in mind. This box measures approximately
16"x12"X8". If you have been thinking about repurosing a wine crate, you should not have to pay more than $5 each, and if you are really lucky you might even get them for free. I was pretty sure I wanted to keep the Cellar No. 8 logo that was on the front panel. It was also on the top along with the ink from where someone had written on the wood. It had a shipping label on it when I first brought it home. I used some rubbing alcohol to remove it and the alcohol just smeared the ink more. No worries, I was going to turn the top panel over and use the blank side. I would be losing the notched finger pull area, but I already had an idea on how to fix that.
The first thing I did was take an ice pick to the top panel. I gouged the wood in several places by dragging the pick across the wood. I wish I had done more, but this is fairly thin pine wood and I didnt want to take any chances of splitting it.
Next, I measured out the area in which I would stencil my design and got busy creating it in Sure Cuts A Lot. I cut the design in temporary vinyl, pulled away the letters and placed the negative on the wood. Deciding to work off the colors in the logo I used Engine Red and Black acrylic paints, I stenciled the words on the wood. Once that was dry, I stained the entire box (inside and out) with Minwax Red Oak Stain (it was what I had on hand). The pictures were taken after just one coat of poly. I know I have to add at least one more coat.
The top slides and I thought that little boys fingers would need an easy way to get to his treasures, so I added a handle I already had in my stash.
Now, I am on a mission to find another of the Cellar No. 8 boxes, so my other Grandson does not feel left out.
This project was totally inspired by Donna's Crate Stair Project
Thanks for stopping by and please come back again soon!
I am linking this to Metamorphosis Monday
and Funky Junk Interiors Saturday Nite Special
and Making the World Cuter
and Under the Table and Dreaming
Reposting to link to Donna's at FJI copy me challenge
Friday, September 3, 2010
First Subway Art
After seeing so many neat subway art projects around blogland, I decided to give it a try. There were so many different subjects I had in mind, but for this I decided to go with family. I used my sure cuts a lot program to design it, cut the words out of vinyl to use as a mask when I sprayed the cranberry colored paint on the canvas. Easy peasy. Thanks for stopping by!
Thursday, September 2, 2010
Piggy Bank
I had this gallon glass jug which I felt needed a new purpose in life. And it just so happens that my grandson could use a bigger piggy bank! The file for this was generously shared by someone on the craftedge forum. Thanks for looking! It's almost the weekend, and a long weekend at that!!!Hope everyone has a fun and safe one.
Wednesday, September 1, 2010
Wine Glasses
These were done using the etch vinyl. By the time I got done I could have used a glass of wine.....but since I was working on these at 5 A.M. this morning and still had a full day of work ahead....well, I think not! I used the dry application method on one and the wet application method on the other. For this project I don't think it made a difference. I have found the etch vinyl very tricky to work with when doing a small design. It's difficult to keep the design in place during weeding. I would love to hear any tips you may have.
Sunday, August 29, 2010
Old picture frame
Happy Sunday morning! This is a recycled picture frame from which I removed the mat and backing. I painted the frame itself with apple spice. I cut the design in mirror image so that I could apply it to the back of the glass. I just have it leaning aginst the wall so it is casting some shadows. I think it will look better when it is hanging on a wall. Thanks for stopping by and have a great day!
I'm linking up to Funky Junk Interiors.
Monday, August 23, 2010
A few more things
I did a few flour sack towels The tea time towel was done with iron on transfer. The first 2 towels are not dirty. I took these pics outside and the tree must have been casting a shadow on them.

as was the "If you can't take the heat" towel.

This towel I made for my sister. The word Gasthaus is the German translation for Inn. I used heat transfer vinyl on this one.

Remember the purse from my last post? I gussied it up a bit.
as was the "If you can't take the heat" towel.
This towel I made for my sister. The word Gasthaus is the German translation for Inn. I used heat transfer vinyl on this one.
Remember the purse from my last post? I gussied it up a bit.
Friday, August 20, 2010
Parlez-vous français
Many moons ago, I had purchased some iron on transfer paper, some cotton table napkins, and a cotton dish towel.....and they just went into the "to do later pile".
Then yesterday I came across Olive Rue's Etsy Shopand discovered a gold mine of designs. I recognized many of the elements of her designs from The Graphics Fairy
but since I don't have photo shop or any of those neat editing programs, I could not have known where to begin to create these wonderful designs. So, lucky for me, I had some money sitting in my paypal account that was just screaming...spend me spend me! And so I obliged and when I got home from work last night I got busy. I absolutely love this Vintage Junk Queen zippered pouch. Perfect for the flea market or garage sale goer. Just think, you can have both hands free to dig around looking for your treasures. I want to jazz it up a little with some trim....it's on the shopping list.

The iron on transfer paper is a little pricey, so I tried to squeeze as many designs onto one sheet that I could fit. The Queen Bee turned out just the right size for this onsie.

This is a sampling of napkins I did. The Robins Nest one is a graphic from The Graphic Fairy and I just added the text.

This is the dish towel. Need to get some more of these.

Thanks for looking! Have a wonderful weekend!!
Then yesterday I came across Olive Rue's Etsy Shopand discovered a gold mine of designs. I recognized many of the elements of her designs from The Graphics Fairy
but since I don't have photo shop or any of those neat editing programs, I could not have known where to begin to create these wonderful designs. So, lucky for me, I had some money sitting in my paypal account that was just screaming...spend me spend me! And so I obliged and when I got home from work last night I got busy. I absolutely love this Vintage Junk Queen zippered pouch. Perfect for the flea market or garage sale goer. Just think, you can have both hands free to dig around looking for your treasures. I want to jazz it up a little with some trim....it's on the shopping list.
The iron on transfer paper is a little pricey, so I tried to squeeze as many designs onto one sheet that I could fit. The Queen Bee turned out just the right size for this onsie.
This is a sampling of napkins I did. The Robins Nest one is a graphic from The Graphic Fairy and I just added the text.
This is the dish towel. Need to get some more of these.
Thanks for looking! Have a wonderful weekend!!
Subscribe to:
Posts (Atom)